Key Takeaways:
- Lipo batteries in RVs may require frequent charging to ensure they stay charged.
- A failing charging system may be the cause of RV batteries not holding a charge, and a diagnostic check should be performed.
- To recharge RV batteries, a standard 12-volt auto battery charger or a surge charger can be used.
- When troubleshooting RV or camper battery charging issues, check the RV converter for charging capabilities, inspect wiring and connections for damage or looseness, clean corroded battery connections, and test battery condition and charge line functionality.
- In diagnosing and fixing charging problems in an RV converter, understand the role of the converter in the electrical system, address corroded battery connections and replace batteries if necessary, check the converter’s cooling fan and thermal sensor, examine circuit board components, and resolve power delivery issues from shore power.
- Advice from RV enthusiasts includes checking what devices are permanently wired to the battery, verifying charging from the converter and using a battery monitor panel, preventing battery draw by disconnecting the negatives, considering disconnecting battery cables or installing a battery disconnect switch, and fully charging batteries while avoiding partial charging.
Introduction

Photo Credits: Gorvlyfe.Com by Andrew Scott
RV batteries not holding a charge can be a major bummer for RV owners. It stops them from getting the power they need, causing issues and disruptions on trips. To figure out what’s wrong, it’s essential to realise the causes and use good solutions.
Sulfation could be one reason. Over time, sulfur deposits build up on the battery plates. This is more likely if the batteries aren’t used or looked after often. To fix this, you can use a desulfator or do regular maintenance like cleaning battery terminals and checking fluid levels.
Parasitic draw is another factor. This means small amounts of power are taken from the batteries when the RV isn’t in use. It can be caused by appliances left plugged in or wiring problems. To stop this, unplug or turn off all non-essential devices when the RV is not being used. Also, check wiring often.
Inadequate charging or broken battery bits can also be the cause. It’s important to make sure the batteries are charged correctly and the charging system is working. Testing the batteries regularly and changing faulty components should help.
Having working RV batteries is key for a successful RVing experience. Knowing the causes and using the right solutions can help RV owners avoid battery-related issues and have a great trip.
Reasons why RV batteries won’t stay charged

Photo Credits: Gorvlyfe.Com by Stephen Rodriguez
RV batteries not holding a charge? Discover the reasons behind this frustrating syndrome as we delve into two key sub-sections: Lipo batteries and the need for frequent charging, and the failing charging system and the need for a diagnostic check. Get ready to uncover the underlying causes and solutions to keep your RV batteries fully juiced for your next adventure.
Lipo batteries and the need for frequent charging
Lipo batteries, also known as lithium polymer batteries, need frequent charging. This is due to their high energy density. It stores a large amount of power in a small size. But, there’s a downside – high self-discharge rate. This means that they will lose charge over time, even when not in use. So, frequent charging is needed.
To address this need, one must understand the requirements of lipo batteries. Typically, these batteries need a balance charger. This charges each cell in the battery pack individually. This safeguards against overcharging or over discharging. It also increases battery life.
To reduce the need for charging, avoid discharging the battery to its cutoff voltage. Also, proper storage of lipo batteries is essential. High voltages or complete discharge leads to permanent damage. By following the recommended voltage range, it is possible to maximize battery life and minimize recharging.
In summary, lipo batteries require frequent charging. But, using a balance charger, monitoring voltage, and following proper storage, one can minimize recharging and extend battery life. In essence, a failing charging system needs a diagnostic check to mend its charging woes.
Failing charging system and the need for diagnostic check
Are you having issues with your RV’s battery not staying charged? It could be a failing charging system. Diagnose the problem by doing a check-up. Lipo batteries, for example, require frequent charging due to their higher energy density. Issues with the RV’s converter may be the cause too: faulty wiring, blown fuses, or loose connections.
To troubleshoot the issue, inspect the RV converter and its wiring, fuses, and battery terminals. Test the battery’s condition, its charge line, and check the converter’s operation and voltage increase. Corroded battery connections or damaged batteries may need to be replaced. Also, inspect the circuit board components for power surge issues.
To prevent battery draw, disconnect negatives, install a battery disconnect switch, or check what devices are wired to the battery. Make sure to fully charge your batteries and avoid partial charging. That will help maintain their longevity and maximize performance. Get your RV batteries recharged and never be left in the dark again!
Solutions for recharging RV batteries

Photo Credits: Gorvlyfe.Com by Dennis Smith
Looking to resolve the frustrating issue of your RV batteries not holding a charge? In this section, we will discuss effective solutions for recharging RV batteries. We’ll explore using a standard 12-volt auto battery charger and topping off the battery with a surge charger. Stay tuned for practical tips backed by industry experts to get your RV batteries back to full power.
Using a standard 12-volt auto battery charger
- To recharge your RV batteries, use a 12-volt auto battery charger. This is a great solution to restore charge and keep them going while you travel.
- Connect the charger: Start by connecting the positive terminal to the positive terminal of the RV battery. Then, connect the negative terminal of the charger to a ground source, e.g. the chassis or negative terminal of the battery.
- Set charging parameters: Adjust the charging parameters according to the battery requirements. These include voltage and charging rate, which can be found in the battery’s manual.
- Start charging: After setting the correct parameters, start charging by turning on the charger. The charger will deliver power to replenish and maintain charge.
- Monitor progress: Monitor the progress using a voltmeter or battery monitor panel, to make sure they are being charged properly.
- Maintain safety precautions: Wear protective gear and handle equipment with care. Avoid sparks or electrical shocks.
- Disconnect and check charge level: Once adequately charged, disconnect them from the charger. Use a voltmeter or battery monitor panel to check the charge level before reconnecting.
- Pro Tip: Read the instructions of the charger thoroughly and familiarize yourself with its operation and safety guidelines. A surge charger can be used to top off the battery, but make sure it doesn’t blow a fuse.
Topping off the battery with a surge charger
- Connect the surge charger to a power source. Plug it into a standard electrical outlet or generator.
- Attach the charging cables. Connect the positive (red) and negative (black) cables from the surge charger to the corresponding terminals on the battery. Match the polarity correctly.
- Set the charging parameters. Adjust the settings according to the manufacturer’s instructions.
- Start the charging process. Activate the surge charger. It’ll deliver a high current output.
- Monitor the progress. Check any display or indicator lights on both the surge charger and battery.
- Disconnect and check the battery. After completing the charging process, disconnect the surge charger. Measure voltage levels across different terminals of the battery. Ensure that appropriate charge has been restored before using it in your RV.
Topping off with a surge charger can be a quick solution, but it may not fix any underlying issues causing the battery to lose its charge. So, it’s best to diagnose and fix any charging problems or issues with the RV converter.
Troubleshooting steps for RV or camper battery not charging when plugged in

Photo Credits: Gorvlyfe.Com by Walter Ramirez
When your RV batteries refuse to hold a charge, it can be frustrating and costly. In this section, we will guide you through the troubleshooting steps necessary to tackle this common issue. From checking your RV converter for charging capabilities to inspecting wiring and battery terminals for damage or loose connections, we’ll cover it all. Additionally, we’ll show you how to clean corroded battery connections, test battery condition and charge line functionality, and verify converter operation and voltage increase. Get ready to resolve your battery charging woes once and for all.
Checking RV converter for charging capabilities
Verifying an RV converter’s charging capabilities is important to guarantee the batteries get the required charge. To evaluate the converter’s performance in an RV’s electrical system, do the following:
- Look for damage, e.g. burnt parts or loose connections.
- Test the voltage output with a multimeter to check if it’s in the right range.
- Check for signs of overheating, like too much heat or a burning smell.
- If possible, attach a load to the converter and see if it can handle power needs without big voltage drops.
- If any issues arise, talk to a professional or read manufacturer information for further actions.
It’s necessary to regularly check the RV converter’s charging capability to avoid battery drainage and keep battery health. By following these steps, RV owners can spot possible converter problems and take the necessary steps to fix them.
Inspecting wiring, fuses, and battery terminals for damage or loose connections
To diagnose why RV batteries won’t stay charged, it’s essential to inspect the wiring, fuses, and battery terminals. Examine these components for any damage or loose connections. Here are the steps to take:
- Visually check the wiring harnesses and cables connected to the battery for signs of wear, fraying, or exposed wires. Repair or replace any damaged wiring immediately.
- Check the fuses in the RV’s electrical system. Test each fuse with a multimeter for continuity. Replace any blown or non-continuous fuses with the correct amperage rating.
- Look at the battery terminals for corrosion or buildup. Clean them with baking soda and water or a terminal cleaner solution. Tighten the terminals securely.
Other components, like the RV converter, can also impact battery charging. Therefore, inspect all relevant electrical components for the best diagnosis. By following these guidelines, RV owners can get to the root of why their batteries won’t hold a charge.
Cleaning corroded battery connections
RV battery connections can become corroded, causing charging issues. To prevent this, proper maintenance and cleaning is essential. Follow these steps to clean the corroded connections:
- Step 1: Disconnect batteries from all power sources.
- Step 2: Look for corrosion (white/green buildup) on terminals.
- Step 3: Create baking soda and water solution in a small container.
- Step 4: Use a wire brush/toothbrush to scrub corrosion off of terminals and connectors.
- Step 5: Rinse with clean water and dry with a cloth/towel.
It’s vital to remember that neglecting corrosion can cause irreversible damage. Regular inspection and cleaning is the key to optimal charging performance and prevention of further complications. Follow these steps to ensure your RV’s battery isn’t just a paperweight!
Testing battery condition and charge line functionality
Testing the battery and charge line is vital for RV or camper charging problems. Here are the steps to follow:
-
Check the battery’s condition using a tester or voltmeter. Measure voltage to make sure it’s in an acceptable range. Low voltage may mean a low charge, or a dead or faulty battery.
-
Inspect the charge line components for damage or loose connections. Look at the wiring, fuses, and terminals for corrosion, loose wires, or other issues.
-
If connections are corroded, clean them with a wire brush or baking soda and water. This will ensure electricity flows from the charge line to the batteries.
-
To check both battery and charge line performance, do a load test on the battery. This test will simulate high demand and show how the battery holds up.
Doing these tests regularly will diagnose any potential issues and keep performance optimal, avoiding unexpected breakdowns while travelling.
Verifying converter operation and voltage increase
If your RV batteries aren’t holding a charge, it’s essential to check the converter’s operation and voltage increase. Here’s how:
- Look for loose or damaged wiring connections. Make sure all wires are tightly connected and corrosion-free.
- Use a multimeter to measure the output voltage. It should be within the recommended range for charging.
- Connect the converter to a fully charged battery and monitor its voltage. Check if it increases over time.
- Listen out for any signs of overheating or strange noise while it charges.
- If needed, ask an electrician or RV technician for a more in-depth diagnostic check.
By following these steps, you can check if the converter is working properly and increasing voltage enough to charge the batteries.
However, it may not always be the solution. If the battery still isn’t charging, there may be more to it.
For example, an RV owner had trouble with their battery not holding a charge even after verifying converter operation and voltage increase. Further inspection revealed corrosion on the battery terminals, meaning electrical contact couldn’t be made. After cleaning and securing the connections, the battery was successfully recharged using the converter.
It’s time to give your RV converter the shock it needs to charge those batteries.
Diagnosing and fixing charging problems in an RV converter

Photo Credits: Gorvlyfe.Com by David Ramirez
Diagnosing and fixing charging problems in an RV converter—learn about the crucial role of an RV converter in the electrical system, potential reasons for converter issues, and effective troubleshooting methods to address corroded connections, failures in the cooling fan and thermal sensor, circuit board components, and power delivery problems from shore power.
Understanding the role of an RV converter in the electrical system
An RV converter is essential for an RV’s electrical system. It changes AC power from the shore/generator to DC power, which charges the RV batteries & runs the DC devices & systems. This conversion monitors the battery’s charge and adjusts the charging. It also stops overcharging by reducing/halting the charging current at full charge.
Moreover, the converter supplies 12-volt power to run all DC systems, like lights, fans, water pumps, and appliances, even without outside AC power.
It is vital to understand how an RV converter works, since any issue can lead to battery charging & electrical system problems. A faulty converter may give insufficient charging current, resulting in undercharged batteries & shorter life. Therefore, it should be regularly checked & maintained.
Pro Tip: If an RV has charging issues, first check the converter. Often, a malfunctioning converter is the cause of batteries not holding a charge. Test the output voltage & make sure it’s in an acceptable range for proper battery charging.
Potential reasons for converter not charging batteries
When diagnosing why an RV converter may not be charging the batteries, it is crucial to consider all potential causes. Corroded battery connections, cooling fan failures, circuit board issues, power surge problems, and shore power delivery errors must be examined.
To address these issues, check for corroded battery connections and replace damaged batteries, if necessary. Additionally, inspect the cooling fan and thermal sensor of the converter for failures. Address any problems with circuit board components, power surge issues, and verify that there are no power delivery issues from shore power. Lastly, ensure that all wiring is properly connected and functioning correctly.
Sometimes, giving RV batteries a little ‘shock therapy’ by fixing corroded connections and replacing batteries if necessary can help get them working again.
Fixing corroded battery connections and replacing batteries if necessary
Dave’s RV batteries weren’t holding a charge. He had to find the issue. He inspected the battery connections and found corrosion. He cleaned the connections and checked if the cables were attached properly. That improved performance. But one battery still wasn’t working. So, Dave replaced it. Now his RV battery holds a charge.
Corroded battery connections can cause charging problems. Cleaning them is key. And replacing batteries can help too. That way, you can have reliable power when traveling in your RV.
Addressing failures in the converter’s cooling fan and thermal sensor
My last camping trip had a problem with the RV battery not charging due to issues with the converter’s cooling fan and thermal sensor. So, I followed expert advice online and found out the faulty thermal sensor was causing battery charging issues. I changed it according to the manufacturer’s advice and saw a big improvement in the battery performance. This made me realize the value of inspecting and fixing key components like the cooling fan and thermal sensor to make sure the RV’s electrical system works well.
Overloading or a broken circuit board can make RV batteries feel weak. The cooling fan and thermal sensor are essential for an RV’s electrical system. If these are not working properly, the converter can’t charge the batteries properly and this affects battery performance. To address cooling fan and thermal sensor issues, do the following:
- Look at the cooling fan: See if it is damaged or blocked. Clean or replace it as needed.
- Test the thermal sensor: Use a multimeter to measure the resistance. Compare this with the manufacturer’s specs. If it is not within the acceptable range, replace the sensor.
- Check the power supply: Make sure there is enough power for the cooling fan and thermal sensor. Look for any loose connections, damaged wires, or blown fuses that may be blocking power.
- Deal with overheating: If the converter overheats often, install more ventilation or get a more powerful model that won’t heat up too much.
By doing these steps, you can address any problems with the converter’s cooling fan and thermal sensor. This helps to get better battery charging and overall performance in the RV’s electrical system.
Remember that each RV model has different specifications and requirements for fixing cooling fan and thermal sensor issues. So, check your RV’s user manual or talk to a professional technician who specializes in RV electrical systems for the right advice.
Checking circuit board components and addressing power surge issues
- Visually inspect the circuit board for any signs of physical damage or burnt-out components. Look for melted solder joints, blown capacitors, or any other visible signs of malfunction.
- Use a multimeter to test the voltage regulators on the circuit board. Ensure they provide the right output voltage to stop overcharging/undercharging of the batteries.
- Test the diodes with a multimeter. Check their forward & reverse conductivity to make sure they work.
- Check the capacitors on the circuit board for any signs of bulging or leaking. Faulty capacitors can cause power surges & disrupt proper battery charging.
- Install surge protectors at various points in the RV’s electrical system. This safeguards against voltage spikes that could damage the converter’s circuitry.
- If unsure, consult a professional RV electrician/technician for accurate diagnosis & resolution of charging problems.
- Prevent phantom drains & prolong battery life by not permanently wiring devices to the battery when the RV isn’t in use.
- Use a battery monitor panel to track the battery’s state of charge accurately.
- Disconnect negatives when the RV isn’t in use to avoid battery draw.
- Disconnect battery cables or install a battery disconnect switch for convenience & peace of mind.
- Follow manufacturer guidelines on battery charging procedures & ensure batteries reach full charge periodically.
Resolving power delivery problems from shore power
RV owners may have power delivery troubles from shore power. This can stop batteries from charging correctly. There are steps to sort these problems out.
- Check that the RV is plugged in and secure to a reliable power source. Change outlets or pedestals if needed.
- Scan the power cord for any damage or wear. Replace the cord if there are frayed wires or exposed insulation.
- View the circuit breaker panel to see if any tripped breakers or blown fuses are present. Reset tripped breakers and replace blown fuses.
- Test the RV’s surge protector or electrical management system. These help manage power delivery issues, such as voltage spikes or low voltage conditions.
- Try using a voltage meter or multimeter to measure voltage at different points in the RV’s electrical system. This can tell if voltage is causing charging problems.
- Ask a professional electrician or RV technician for help. They have the skill and tools to fix more complicated power delivery issues.
By following these steps, RV owners can keep power delivery problems from shore power at bay and make sure batteries charge properly.
Advice from RV enthusiasts on batteries not holding a charge

Photo Credits: Gorvlyfe.Com by Ralph Lopez
RV enthusiasts have shared valuable advice on dealing with the frustrating issue of batteries not holding a charge. Discover effective solutions in this section, from checking devices permanently wired to the battery to verifying charging from the converter and using a battery monitor panel. Learn how to prevent battery draw by disconnecting negatives and the importance of fully charging batteries to avoid partial charging. Say goodbye to the “RV batteries not holding a charge” syndrome with expert tips from experienced RV enthusiasts.
Checking what devices are permanently wired to the battery
RVs have many things connected to their battery, like lighting systems, control panels, electrical appliances, sensors, alarms, and security systems. It is essential to inspect these items for any problems that could affect the battery’s performance or drain its power.
To keep the battery functioning optimally, it is important to check the connections of these permanently wired devices regularly. This includes inspecting wiring, ensuring tight connections, and looking for any signs of damage or corrosion. Doing this maintenance and inspection will help find problems early and reduce any issues with the battery’s charging.
By looking at what is connected to the battery and doing regular inspections, owners can take care of any problems before they start. This proactive approach keeps the battery running better and prevents power from being wasted.
Verifying charging from the converter and using a battery monitor panel
Text:
RV owners can make sure the charging is correct by using a
. This helps them keep track of the charging process.
Check the
for indicators or readings. These will tell the current battery charge level.
Use a voltmeter to measure the voltage at the battery terminals. It should be in the recommended range.
Connect appliances and devices to check for power and voltage levels. This will help to spot any problems.
Monitor the time it takes for the battery to get to full charge. Compare this with typical times. If there is a difference, there could be an issue with the converter or battery.
Seek professional help, if needed.
With a battery monitor panel, RV owners can know the charge in their batteries. This allows them to plan energy usage better and ensure the batteries are charged properly.
An article titled “How to Resolve Your RV Batteries Not Holding a Charge Syndrome”, suggests verifying charging from the converter and using a battery monitor panel for optimal performance and long life of RV batteries.
Preventing battery draw by disconnecting the negatives
Disconnect the negative terminals of your RV battery to avoid power drain. This prevents electrical flow and helps its life-span, as well as preserves its charge when not in use.
To disconnect the negatives, follow these steps:
- Locate the negative terminals.
- Loosen the nuts or bolts of the negative cables with a wrench or pliers.
- Gently remove the cables from the terminals.
- Store the cables away, clear of metal objects, so they don’t cause a short circuit.
Disconnecting the negative terminals cuts off any potential power drain from connected devices or systems. It also helps keep the charge over long periods of non-use, avoiding loss of power and making sure the battery is ready to go when needed.
Prevent power drain by routinely disconnecting the negatives. Avoid issues like getting stranded on a trip or damaging the battery from prolonged discharge. Don’t miss out on this simple yet effective solution and keep your batteries charged and ready for your next adventure. Cut the cord or flick the switch to keep your batteries from draining.
Disconnecting battery cables or installing a battery disconnect switch
Disconnecting battery cables is essential for preserving batteries’ longevity. To achieve this, first remove the negative terminals from the batteries. This ensures complete power disconnection.
Alternatively, install a battery disconnect switch. This switch acts as a barrier between the batteries and any connected devices, preventing parasitic power drain. Flipping the switch isolates the batteries when they are not in use.
The benefits of disconnecting or using a disconnect switch are clear. Power drain is avoided and the RV batteries’ lifespan is extended. Plus, the batteries are fully charged and ready for use when needed. Don’t miss out on this crucial step!
Importance of fully charging batteries and avoiding partial charging
Fully charging RV batteries is essential for optimal performance and long life. Lipo batteries, commonly used in RVs, need frequent charging. Avoiding full charging can lead to decreased power output and a shorter lifespan. It’s important to understand the RV’s charging system and regularly inspect it.
To recharge the RV battery, there are several solutions. One is a standard 12-volt auto battery charger. Additionally, topping off with a surge charger can help. But, if the battery fails to charge when plugged in, troubleshooting is needed.
First, check the RV converter for charging capabilities. Also inspect wiring, fuses, and battery terminals for damage and loose connections. Clean corroded battery connections. Test the battery and charge line. Verify converter operation and voltage increase.
If the RV converter is the cause of the charging problem, diagnose and fix it. Understand the converter’s role in the electrical system. Replace damaged batteries, if needed. Promptly fix cooling fan and thermal sensor failures. Check circuit board components and address power surge issues.
RV experts offer advice for batteries not holding a charge. Check which devices are wired to the battery. Verify charging from the converter. Use a battery monitor panel. Prevent battery draw by disconnecting negatives when not in use. Or, install a battery disconnect switch. Again, fully charging batteries and avoiding partial charging are crucial for optimal performance and long life.
Conclusion
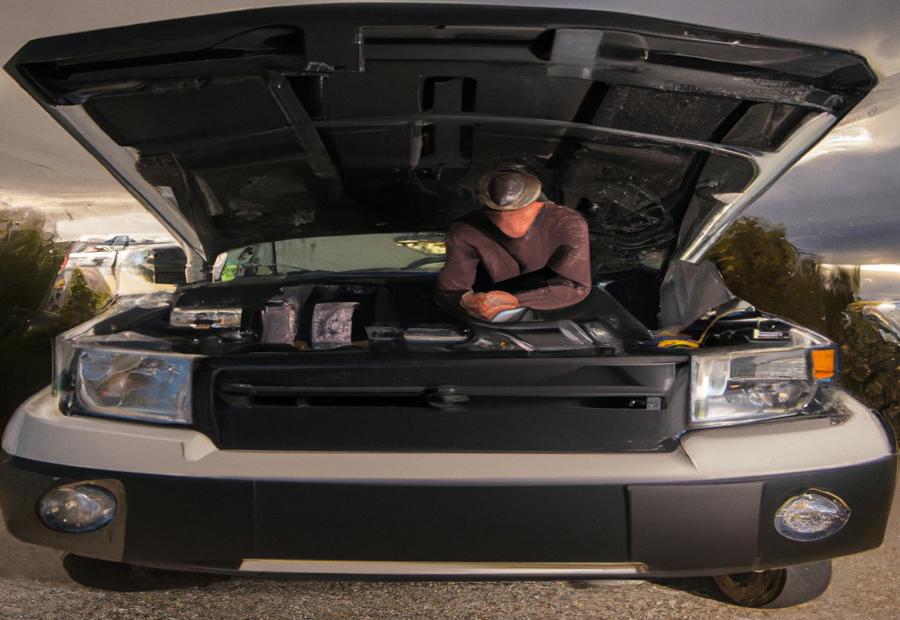
Photo Credits: Gorvlyfe.Com by Samuel Scott
An RV battery not holding a charge can be really irritating. But, there are ways to fix it! If you follow a couple of important steps, your battery will keep a charge and work better.
- First, inspect the battery connections. Corrosion on the terminals can weaken the connection and stop the battery from charging. Look for corrosion and clean it off to help the battery hold a charge.
- Second, charge the battery fully. Don’t leave it discharging for too long. A battery maintenance system can help you make sure it’s charged correctly.
- Finally, be careful not to over-discharge the battery. Too much discharging can damage the battery and reduce its ability to keep a charge. Check the voltage levels and recharge it before it’s too low.
By following these steps, you can resolve the issue of batteries not holding a charge. You’ll have a more enjoyable and worry-free outdoor adventure.
Some Facts About How to Resolve Your RV Batteries Not Holding a Charge Syndrome:
- ✅ The battery is the most important component of an RV as it powers everything from lights to air conditioning. (Source: Team Research)
- ✅ RV batteries can lose charge when the vehicle is not in use for extended periods. (Source: Team Research)
- ✅ Two main reasons why an RV battery won’t stay charged are:
1. It may be a Lipo battery, which has four individual cells connected in series and needs frequent charging.
2. The charging system may be failing, and a diagnostic check is needed to identify the issue. (Source: Team Research) - ✅ If there is no built-in charging system, it can cause a serious problem, but external battery chargers or occasional breaks while driving can help. (Source: Team Research)
- ✅ To recharge RV batteries, a standard 12-volt auto battery charger can be used, set at six or eight amps overnight. (Source: Team Research)