
Key Takeaway:
- The RV battery disconnect switch is essential in preventing battery drainage and electrical damages, prolonging battery lifespan, and ensuring safety during maintenance.
- It works by cutting off power to the primary circuit, preventing continuous power draw from devices and battery drain.
- Installing the switch on the negative side of the battery, using the right switch for the RV’s electrical system, and regularly testing connections are important considerations for proper functionality and maximizing battery life.
Introduction to the RV Battery Disconnect Switch
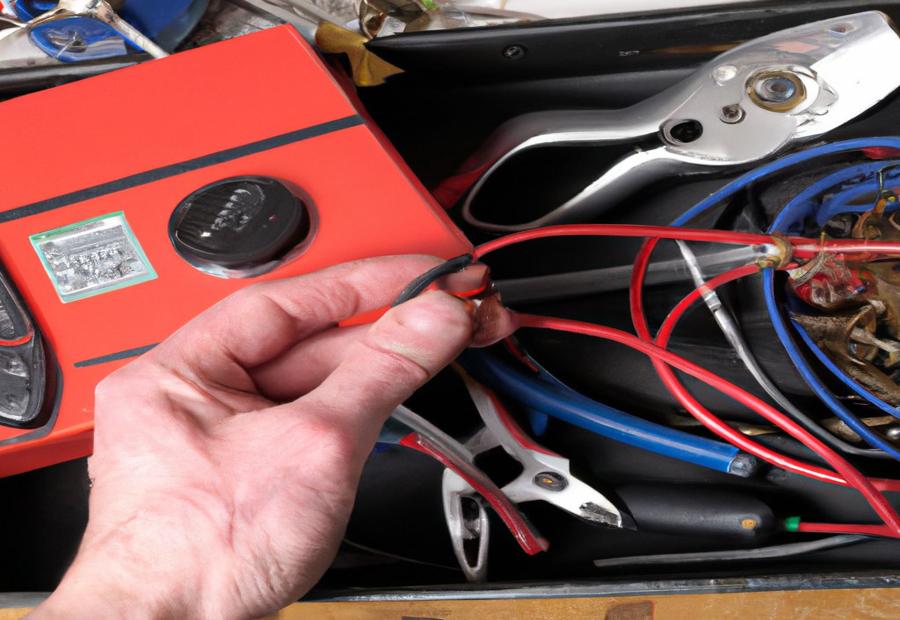
Photo Credits: Gorvlyfe.Com by Douglas Martin
The RV battery disconnect switch is a crucial component for preventing battery drainage, protecting against electrical damages, extending battery lifespan, and ensuring safety during maintenance. In this introduction, we will explore the importance of the RV battery disconnect switch and how it plays a vital role in preserving battery health and promoting safety in RV systems.
Importance of the RV battery disconnect switch in preventing battery drainage and electrical damages
The battery disconnect switch is crucial for RV safety. It cuts off power to the primary circuit, stopping power draw. This stops battery drainage, extends battery life, and reduces electrical issues.
Plus, the switch provides a safe disconnection during maintenance work. It’s easily accessible in the RV, so users can activate or deactivate it as needed.
Make use of the magic of the battery disconnect switch. It’s vital for protecting against battery drainage and electrical damages. Keep your RV battery safe and your wallet happy!
Role of the switch in extending battery lifespan and ensuring safety during maintenance
The RV battery disconnect switch is key to preserving the battery’s life. It prevents continuous power draw and secures safety during upkeep. By breaking the primary circuit, the switch stops devices from draining the battery. This conserves energy and guards it from early wear and tear.
For maintenance, the switch gives an important safety feature. It separates the battery’s electrical connection, avoiding accidental electrical shocks and short circuits while examining wiring or doing repairs.
Plus, the RV battery disconnect switch defends against electrical issues or fire. If there is a fault or electrical overload, switching off the switch fast can stop more damage and possibly save lives.
To sum up, the RV battery disconnect switch is vital in extending the life of the battery. It prevents continuous power draw and shields it from premature decay. Also, it guarantees safety during maintenance by cutting the electrical connection and offers protection from potential electrical problems or fire threats.
Disclaimer: The material provided here is meant for amusement and knowledge only. It is essential to do extra research and take necessary precautions before installing or using an RV battery disconnect switch.
How the RV Battery Disconnect Switch Works
Photo Credits: Gorvlyfe.Com by Lawrence Carter
The RV Battery Disconnect Switch is a crucial component that plays a vital role in managing power consumption. In this section, we will uncover how this switch effectively cuts off power to the primary circuit, preventing continuous power draw and potential battery drain. We will also explore the switch’s location within the RV and its accessibility, ensuring a convenient and efficient operation. Get ready to dive into the inner workings of the RV Battery Disconnect Switch.
Explanation of how the switch cuts off power to the primary circuit
The RV battery disconnect switch is a must-have! It cuts off the flow of electricity to the primary circuit. It helps preserve the battery’s charge. It’s usually located in the control panel or on a wall inside the RV. Here’s a 5-step guide:
- Find the switch.
- Flip it to “Off”.
- Break the connection.
- Stop power draw.
- Flip the switch back to “On” to restore power.
For more info, check out paragraph 2.
Pro Tip: Remember to turn off all appliances and electrical devices before flipping off your RV’s battery disconnect switch. This will protect your electrical system and prolong the battery’s lifespan.
Function of the switch in preventing continuous power draw and battery drain from devices
A RV battery disconnect switch is key for avoiding constant power draw and battery drain from devices. How does it work?
- – It lets users turn off the main circuit, halting any power flow to the related gadgets.
- – It detaches the batteries from the electrical system when it’s not being used, avoiding devices from using power unnecessarily and draining the batteries.
- – This is particularly useful during storage times or when the RV isn’t in use for a long while, as it helps keep battery life and prevents damage.
- – Plus, the switch provides safety when doing maintenance by giving a way to insulate and de-energize the electrical system, reducing the risk of electric shocks or accidents while working on the RV’s wiring.
- – In the case of any electrical problems or fire, the battery disconnect switch offers an extra layer of protection by easily cutting off power supply to all related devices.
In conclusion, an RV battery disconnect switch is essential for stopping continuous power draw and battery drain from devices. Its capacity to cut off power to the principal circuit helps prolong battery lifespan and makes sure security during upkeep. It also furnishes defense in case of electrical issues or fire. So, investing in a proper setup and using this device properly is strongly suggested for all RV owners.
Location of the switch in the RV and its accessibility
The RV battery disconnect switch is a must-have part. It stops batteries from running down and shields from electrical harm. Knowing where it is and how to reach it is key. This helps run and maintain the RV’s electric system correctly.
It is best to put the switch close to the owner or user. This way, turning it on or off is easier. And, it should be in a place that guards it from damage or accidental switching. Putting it somewhere secure and visible protects against unintended electricity problems.
It is also sensible to install it near other essential components like the battery or main electric panel. This makes connecting and maintaining it simpler.
In conclusion, these steps make sure RV owners can use the switch quickly and safely. By strategically positioning it and making it available, owners can manage their RV’s power supply and avoid potential risks.
Benefits and Uses of the RV Battery Disconnect Switch
Photo Credits: Gorvlyfe.Com by Kevin Young
Discover the benefits and uses of the RV Battery Disconnect Switch, an important component for every RV owner. From preventing battery discharge and degradation during storage to ensuring safety during maintenance and electrical work, this switch offers essential protection. In case of electrical issues or fire, the RV Battery Disconnect Switch acts as a safeguard, providing peace of mind on your adventures.
Importance of using the switch during storage to prevent battery discharge and degradation
The RV Battery Disconnect Switch is vital for preserving battery performance and longevity. It cuts off power to the primary circuit, avoiding continuous power draws or parasitic drains.
To keep the battery in optimal condition during storage, here is a 3-step guide:
- Find the switch, usually near the main control board. Make sure it’s accessible.
- Switch off all devices connected to the RV’s electrical system.
- Activate the Battery Disconnect Switch. This will cut off power flow and protect the battery.
These steps, plus other factors such as temperature and maintenance, help prevent battery discharge and degradation. An Essential Guide to Installing an RV Battery Disconnect Switch provides detailed instructions on installing it safely. Protect your battery with this switch!
Safety advantages of the switch during maintenance and electrical work
An RV battery disconnect switch offers a host of safety perks when it comes to maintenance and electrical work. Such as:
- Preventing accidental electric shock: It cuts off power to the primary circuit, meaning no electricity is running through the RV’s electrical system. Reducing the potential for electric shock when touching wires, connectors, or other electrical components.
- Safeguarding against short circuits: By disconnecting the battery from the RV’s electrical system, any unintentional shorts are avoided. Thus, averting damage to the battery and other connected devices.
- Eradicating fire hazards: Electrical malfunctions can spark fires in an RV. By using the switch, the risk of a fire caused by faulty wiring or other electrical issues is dramatically decreased, preserving the safety of people and property.
- Lowering accidental device damage: During maintenance or repairs, unintended activation of devices connected to the RV’s electrical system can cause damage. The battery disconnect switch stops continuous power draw from these devices, thus, minimizing such harm.
- Securing against unauthorized access: When doing maintenance tasks on an RV, it is vital to protect the electrical system from tampering or unauthorized use. The RV battery disconnect switch allows for easy shutting down and disconnection of power, ensuring only approved persons have access to the system.
The RV battery disconnect switch ensures a secure working environment by averting risks associated with electricity.
Protection provided by the switch in case of electrical issues or fire
The RV battery disconnect switch is a must-have component offering vital protection should electrical issues or fires occur in the vehicle. It acts as a safeguard between the main power source and the rest of the electrical system, avoiding further damage. In case of a short circuit or power surge, the switch quickly cuts off power to the primary circuit, preventing damage from a malfunctioning system. Moreover, it plays an important role in fire safety by isolating the battery from the electrical system, which reduces the risk of further fuel for the fire. A flip of the switch disconnects the battery, potentially snuffing out or containing any flames before they can spread.
In the event of electrical issues or fires, easy access to the RV battery disconnect switch is essential. Its location and operability give convenience and confidence when attempting to ward off potential hazards and handle any dangers.
Nonetheless, it is important to note that the switch should not be solely relied upon to address all electrical issues or fires. It should be coupled with other safety measures, like smoke detectors and fire extinguishers on board, regular inspection of all electrical components, and appropriate emergency procedures.
To guarantee the safety of your RV’s battery, it is recommended to power down, connect cables correctly, and mount the switch. Taking these precautions looks after the battery and ensures its longevity.
Installation Process of the RV Battery Disconnect Switch
Photo Credits: Gorvlyfe.Com by Jose Walker
Installing an RV battery disconnect switch is crucial for the safety and efficiency of your RV’s electrical system. In this section, we will take you through the step-by-step installation process. From the items required and their purpose to detailed instructions on connecting cables and mounting the switch, we’ll ensure you have all the information you need. Plus, we’ll highlight the importance of installing the switch on the negative side of the battery for maximum effectiveness. Let’s dive into the installation process and get your RV powered up securely!
Items required for installation and their purpose
Installing an RV battery disconnect switch requires certain items. They are vital for the setup and have particular roles. To help with the installation, here are the items required:
- Disconnect Switch: This controls power flow between the battery and RV devices. It lets you disconnect easily when the vehicle isn’t in use.
- Wires and Cables: These link the switch and other parts of the electrical system. Use right-sized cables to prevent overheating.
- Connectors: Used to join wires or attach them to the switch. Crimp connectors or soldering are options.
- Mounting Hardware: Screws, bolts, or brackets to fix the switch in a secure spot. Choose somewhere sturdy, visible, and protected.
- Wire Strippers/Cutters: To prepare wires by removing insulation or cutting them.
- Electrical Tape: Insulate and protect against short circuits. Tape secures wire connections and prevents contact with exposed conductors.
- Safety Equipment: Wear gloves, goggles, etc. to reduce risks of electric shock or injury.
Having these items ensures a successful installation. Check the manufacturer’s guidelines or seek professional advice as requirements may vary.
Step-by-step guide to installing the switch, including connecting cables and mounting the switch
- To install an RV battery disconnect switch, gather the necessary items like the switch, cables, connectors, and tools.
- Find a spot near the battery or central to your RV to mount the switch.
- Connect one cable to the negative terminal of the battery and the other end to one terminal of the switch.
- Connect the second cable from the other terminal on the switch to any ground point.
- Securely mount the switch in its designated location.
- Follow all instructions carefully and consult your owner’s manual for proper installation procedures.
- Always remember: with RV battery switches, stay on the negative side!
Importance of installing the switch on the negative side of the battery
Installing the switch on the negative side of the battery is vital for several reasons.
- It enables simple disconnection of power to the primary circuit. Cutting off power at the negative terminal stops any current flow and avoids extra drain on the battery.
Plus, placing the switch on the negative side stops continuous power draw and battery drain from devices. Turning off the switch ensures no power is taken from the battery when devices are not in use or during storage. This saves battery life and stops potential damage caused by too much discharge.
The switch’s location in the RV also matters. It should be accessible so it can be easily switched off during emergencies or maintenance work. Placing it near the batteries or other electrical components allows for easy use and safe handling.
In short, fitting an RV battery disconnect switch on the negative side is essential for avoiding unnecessary drain, preserving battery life, and ensuring safety during maintenance. Its position must be accessible and strategically placed for quick access and operation. Taking these precautions helps lengthen battery lifespan and guards against electrical problems or fire hazards that may occur in an RV’s electrical system.
Selecting the correct switch for your RV’s electrical system is the key to a battery that stays charged longer than a toddler’s attention span!
Tips and Considerations for Using the RV Battery Disconnect Switch

Photo Credits: Gorvlyfe.Com by Anthony Smith
When it comes to using the RV battery disconnect switch, there are key tips and considerations that every RV owner should be aware of. From choosing the right switch for your RV’s electrical system to testing the connections for proper functionality, this section will provide you with important insights. Plus, we’ll share additional precautions and expert advice for maximizing battery life and ensuring safety on your RV adventures. So, let’s dive into the essential tips for using the RV battery disconnect switch.
Recommendations for choosing the right switch for the RV’s electrical system
Selecting the precise switch for your RV’s electrical system is a must for optimal performance. Here are some tips to take into account:
- Compatibility: Your switch must fit in with your RV’s electrical system. Consider voltage and amperage needs for a perfect fit.
- Durability: Pick a switch that can withstand the tough conditions of the RV. Choose one made of top-notch materials for longevity.
- Ease of Use: Select a switch that’s easy to use. Look for features like clear labeling, ergonomic design, and intuitive function.
Be sure to ponder these tips when selecting a switch. By picking one that is compatible, durable, and user-friendly, you can guarantee reliable power management and maximize the RV’s performance.
Testing the connections and ensuring proper functionality
Testing connections is key to ensure the RV battery disconnect switch works properly. This stops power draw from devices, saving the battery and avoiding electrical damage.
Test the connections:
- Find the switch. Usually near the battery or inside the RV.
- Check that all wiring is connected securely to the switch and battery.
- Measure voltage with a voltmeter or multimeter when switch is “on” and “off”.
- Test various devices and systems in RV. Lights, appliances, and other electrical components should all be deactivated with switch in “off” position.
Regular testing and maintenance of the switch is important. If any issues arise, professional help may be needed. Safety is vital when dealing with RV electrical systems.
Give your RV battery and trips a boost with these battery life and safety tips.
Additional precautions and expert advice for maximizing battery life and safety
To keep your RV battery safe and long-lasting, it’s important to take extra safety measures and get expert advice. Doing so will help you get the most out of your battery and avoid any risks.
- Regular maintenance: Check and clean the battery terminals regularly to prevent corrosion, which can decrease battery performance and life.
- Proper charging: Follow the recommended charging procedures and don’t overcharge or undercharge your battery to make it last longer.
- Temperature control: Keep your battery away from extreme temperatures by storing your RV in a controlled environment when possible.
- Power conservation: Be careful with your power usage when using electrical devices in your RV to reduce strain on the battery.
- Safety during maintenance: When working on your RV, use the battery disconnect switch to cut off power from the primary circuit for added safety.
Apart from these precautions, be aware of other factors that can affect battery life and safety. Check the battery cables and connectors for signs of damage or wear, and consider getting a surge protector for your RV’s electrical system to protect against sudden power surges.
By following these tips and getting expert advice you’ll make sure your RV battery is safe and lasts longer. Implementing these measures will let you have worry-free trips and enjoy your RV experience to the fullest. Don’t neglect these essential precautions.
Troubleshooting RV Battery Disconnect Switch Issues
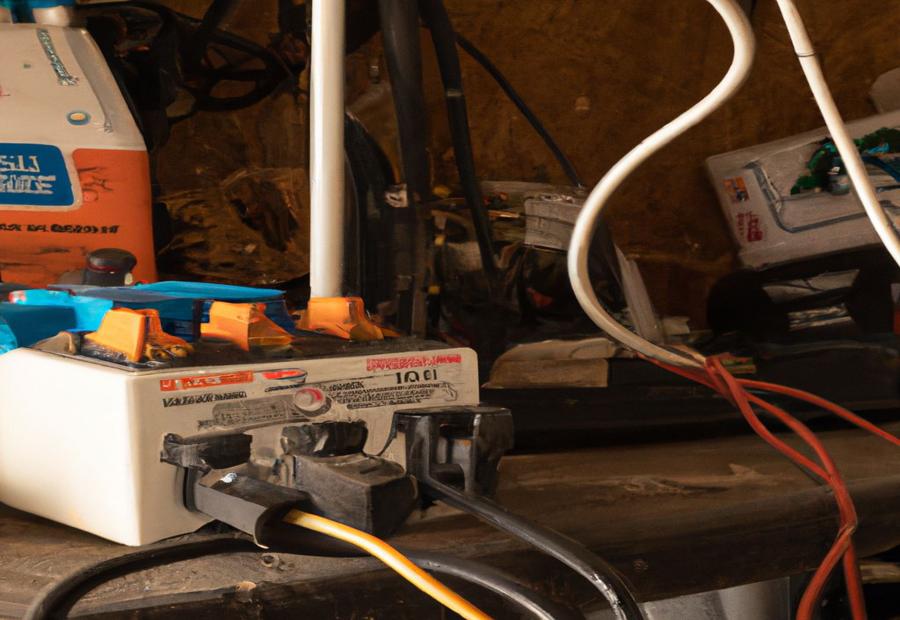
Photo Credits: Gorvlyfe.Com by Kenneth Martinez
If you’re facing issues with your RV battery disconnect switch, this troubleshooting section will help you get things back on track. From common problems and their causes to step-by-step solutions for switch placement, corrosion, connections, and overuse, we’ve got you covered. Plus, we’ll guide you on when it’s time to consider replacing the switch and seeking professional help. Don’t let battery disconnect switch issues disrupt your RV adventures – let’s fix them together.
Common problems with the switch and their causes
The RV battery disconnect switch can suffer from common issues, disrupting the vehicle’s electrical system. Identifying these issues and understanding why they occur is important for resolving any problems.
- Switch Failure: The switch can fail when its internal components wear out or suffer damage. Poor installation or too much moisture can also cause problems.
- Poor Connection: Poor connections between the switch and the battery terminals can lead to power loss or an inability to disconnect the battery. Loose or corroded cables will cause this.
- Corrosion: Corrosion on the battery or in the switch can hinder electrical conductivity. This is worsened by moisture, high humidity, or harsh environments.
- Overuse: Excessive or improper use of the switch can strain the electrical system, wearing out components.
- Misalignment: Misalignment of the switch during installation can make it hard to activate or deactivate.
- Inadequate Switch Capacity: A switch that can’t handle your RV’s electrical demands may cause overheating or failure.
Every RV is unique; additional factors may also cause issues. Regular maintenance and troubleshooting can help minimize problems and guarantee a reliable electrical system.
Steps to fix issues with switch placement, corrosion, connections, and overuse
Troubleshooting RV battery disconnect switch issues is key for properly functioning electrical systems. Address these problems right away to avoid further damage and to extend the life of your batteries. Follow these four steps to fix common issues:
- Check switch placement. Inspect the location to make sure it’s accessible and properly mounted. If not, reposition.
- Deal with corrosion. Use a wire brush or cleaner to clear buildup from terminals and connections. Apply protective coating like dielectric grease.
- Examine all connections. Make sure wires are securely connected and no signs of fraying or damage. Tighten loose connections if needed.
- Don’t overuse it. Excessive switching can strain the components. Replace it if you notice signs of overuse.
Some complex issues require professional help. Research and take precautions based on your RV model and electrical system. Sign up for newsletters and join online communities for updates. Lastly, remember: if it ain’t broke, don’t fix it!
When to consider replacing the switch and seeking professional help
The RV battery disconnect switch is a key piece that needs to be changed. It might need a pro in certain cases.
When thinking of replacing the switch, several indicators must be checked:
- If you spot any damage or wear on the switch, such as rust or corrosion, it might be time to replace it.
- If the switch fails to cut off power to the primary circuit, or does not disconnect the battery from devices, then it needs changing.
For certain cases, getting professional help is the best option. If you have difficulty with the placement or mounting, experts can give advice and make sure it’s installed correctly. Also, if there are corroded or loose connections, experts can help sort the problems.
If all troubleshooting attempts fail and the switch continues to malfunction, replacement may be necessary. At this stage, seeking professional help can guarantee a proper replacement and reduce risk of further damage.
Remember that electrical systems are complicated and dangerous if handled wrongly. So, if you are not sure how to replace or repair the RV battery disconnect switch, it is wise to get help from experts.
Conclusion and Additional Resources
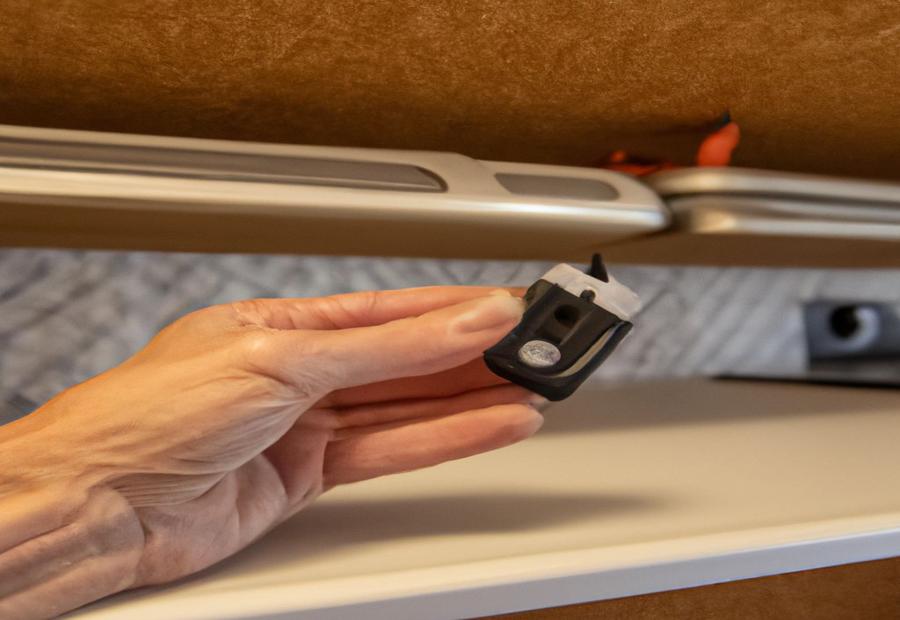
Photo Credits: Gorvlyfe.Com by Gary Garcia
In conclusion, understanding the benefits and importance of an RV battery disconnect switch is crucial for a smooth and safe camping experience. Explore additional resources to stay updated on all things RV-related, and consider joining newsletters or websites for comprehensive information. However, it’s important to note that the content provided is for entertainment and information purposes only, and additional research and precautions are necessary. Remember, the key to hassle-free adventures lies in being well-informed and taking necessary precautions.
Recap of the benefits and importance of the RV battery disconnect switch
The RV battery disconnect switch is essential, preventing battery drainage and potential electrical damages. It cuts power to the primary circuit, thus stopping power draw and conserving battery life. This extends battery lifespan and keeps you safe during maintenance and electrical work.
It’s usually found in a reachable place in the RV. Especially during storage, it’s important to switch it off to prevent discharge and degradation. Plus, the switch adds another layer of protection against electrical issues or fire.
When installing the switch, it’s crucial to pick the correct one for your RV’s system. Test connections and make sure it works properly to optimise performance. Also, extra precautions can be taken for longer battery life and safety.
If there are any issues with the switch, troubleshooting may help. This can include placement, corrosion, connections and overuse. If necessary, look into replacements and get expert help.
In summary: the RV battery disconnect switch prevents battery drainage and electrical damages; it extends battery life; it’s safe for maintenance and storage; it gives protection in case of electrical issues or fire; it optimises performance when installed correctly and tested; it troubleshoots common problems.
For more info about RV topics or anything related to the battery switch, join newsletters and websites with more resources and accurate information. Get connected with RV lovers and receive the latest tips for all your RV escapades!
Option to join newsletters or websites for more RV-related information
Joining RV newsletters and websites is great for those who want extra info and resources. These platforms offer tons of knowledge, tips, and updates about batteries, electrical systems, and safety. By subscribing or following sites, RV enthusiasts stay informed on the latest advancements, maintenance techniques, and trends. This helps them understand battery disconnect switches and make informed decisions, like usage, installation, and troubleshooting.
Also, joining these newsletters or websites gives RV owners the chance to connect with others who share their passion. This can lead to sharing experiences and advice about disconnect switches, camping, maintenance, and tech upgrades. Members learn from each other’s successes and challenges, expanding their knowledge in a supportive environment.
Finally, subscribing to newsletters or accessing related websites ensures constant education and awareness in a fast-changing industry. When new research, tech advancements, or safety guidelines come out, these platforms quickly spread the word to subscribers. This keeps RV owners up-to-date on the best practices for using the battery disconnect switch while avoiding potential electrical hazards or fires.
Disclaimer of the content being for entertainment and information purposes only and the need for additional research and precautions.
This piece is for entertainment and info only. Not a replacement for expert advice. It has been researched carefully, but individual cases may differ. So, more research and safety precautions should be taken before putting any suggestions into action.
This article is just a guide. People should make decisions based on their own needs. Stay current with industry standards by referring to reliable sources and getting professional advice when needed.
Remember: this provides insight into RV battery disconnect switches, but you need to do your research and take responsibility to ensure safety and effectiveness with any electrical system changes or additions on your RV.
Some Facts About Essential Guide to Installing an RV Battery Disconnect Switch:
- ✅ An RV battery disconnect switch is crucial for preventing battery drainage and electrical damages caused by accidental shorts. (Source: Camping Comfortably, The RV Geeks, TheTouringCamper.com, Mortons On The Move, China Daier)
- ✅ The switch is typically located in the battery compartment or directly next to the batteries themselves. (Source: Camping Comfortably, The RV Geeks, TheTouringCamper.com, Morton’s On The Move, China Daier)
- ✅ Proper use of a disconnect switch can improve battery life and safety in an RV. (Source: TheTouringCamper.com, Morton’s On The Move, China Daier)
- ✅ The RV battery disconnect switch is relatively easy to install and can be done by oneself or by hiring professionals. (Source: The RV Geeks, Morton’s On The Move, China Daier)
- ✅ The battery disconnect switch is an affordable investment, with prices ranging from $15 to $30. (Source: Morton’s On The Move, China Daier)